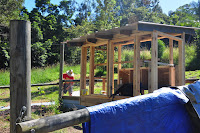
After scouring the net for design ideas/plans, I found that most of the designs required a concrete slab (which I did not want), had gable roofs and were in imperial measurements. One of the best sites for designs (that I could find) was Backyard Chickens.
My key elements were for the house to be off the ground and the roof to be slanted to catch and store the rain run-off in a nearby water tank. Initially I thought that I could use only Plywood for the walls and 'something waterproof' for the roof, but the more I researched, the more I realised that I was going to need to frame the house. I also had planned to use large bamboo (90mm diameter +) for the posts and hoped that they could simply sit on top of the ground, but after a rather crazy storm one night, decided that the posts needed to be sunk.
I began searching around for framing timber, posts & sheet metal at recycling depots, eBay and any 'budget' hardware stores but after making my way around our new property, I was lucky enough to discover a large pile of old timber and posts. The rest of the materials came from eBay and Bunnings.
The plan was that the coop itself be at least 900mm off the ground, primarily so the girls would be safe at night and aid in easy cleaning & egg collecting. I had also read that good ventilation was key to a healthy chook (Australian for chicken) house.
Materials used:
- 2x4' (35x70mm) structural timber (for framing). You could use smaller timber, but as our chook house was going to be in an open field with little protection from the wind, I went for something with more strength.
- 12mm External Plywood (for floor and nesting boxes). On hindsight, I should have used at least 15mm as the 12mm tended to bow/warp. Depending on your budget, FormPly or MarinePly could be substituted as a better option in terms of weatherproofing.
- Colorbond Sheeting (for roof and cladding).
- 2x4' (45x90mm) timber (for roof rafters).
- 4 door hinges (for doors)
- 1 piano hinge (for nesting box lid)
 |  |  |
| Framing and rafter timber used | Plywood sides for nesting box | Nesting box assembled |
 |  |  |
| Frames clamped together | Plywood nesting box | PPE - improvised |
As I was elevating the chook house, I needed to dig fairly deep holes for the posts. I wanted the base to be 900mm off the ground, so the minimum depth of the holes needed to be 450mm (going off the 1/3 rule i.e. 1/3 in the ground). Unfortunately at about 400mm, I hit water as the dam isn't to far away from the pen area. That meant I needed to go down further and then include some gravel into the base of the post hole. I was concerned about cross winds seeing as the house was elevated.
 |  |  |
| Pen area all cleared | Post holes (red post hole tool used) | Water seeping into the holes |
 |  |
| Poles used | Poles set using PostCrete and supported by 2 bits of timber |
Now it was time to clad and wire the house.
Final product:
You may have noticed that the coop area is covered with netting and 'enclosed' with sheet metal (in the ground), this was for protection from air and ground predators. There are apparently a number of foxes and wild dogs in the areas, not to mention large snakes. I decided to enclose a 6m x 6m area that the chooks can be relatively safe in during the night as well as if we were away. Having said that, the gate to the enclosed area is opened & closed (almost) everyday so the girls can free range in the soon to be garden paddocks surrounding the chook pen.
Anyway, the girls are in and seem to be happy with their quarters...


